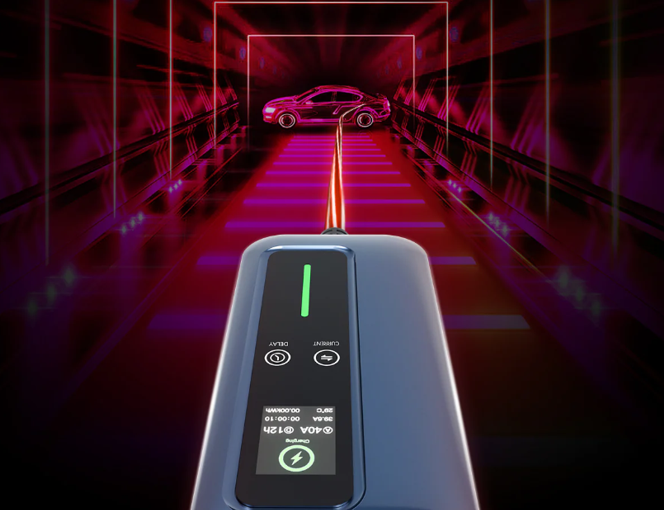
Portable electric vehicle (EV) chargers are a portable solution that provides electric vehicle owners with flexibility and convenience wherever you go. Whether you are out on the road, facing an unexpected low battery, or visiting a location without a dedicated charging station, a portable charger ensures you can power up your EV reliably. This guide will guide you through how to safely and efficiently use a portable EV charger.
Understanding Portable EV Chargers
While a portable EV charger may initially seem simple, it has several components specifically designed to help provide safe and effective charging. The diagram below shows some of these basic components:


In general, portable chargers come in two main types:
-
Level 1 (120V): Slower charging, usually suitable for home use or overnight charging.
-
Level 2 (240V): Faster charging, ideal for shorter stops or heavier charging needs.
When selecting a portable EV charger, you should consider charging speed, what type of cable you want, compatibility with your specific EV, and safety certifications. Portable chargers are especially useful for home backup charging, long trips, and areas with limited options for public fast-charges.
How to Use a Portable EV Charger
In this guide, we’ll use the Orion Motor Tech Portable EV Charger as an example. While the steps below provide a clear guide for this specific model, keep in mind that different portable EV chargers may have slightly different set-up or operation. Always refer to the user manual for your charger to ensure a safe and proper processes.
STEP 1
Confirm that your vehicle is ready for charging. Check that your power outlet, charging plug, cable, and control box are free from any signs of damage.
STEP 2
Connect the charger to the socket designated for your charger’s model. For MD-PA-16A, use the provided adapter cable if needed. The first LED light of the charging status indicator should come on. The charger display should show ready as shown.

STEP 3
Hold the current adjustment button until the current display shows the lowest current value, which starts at 6 A for MD-PA-16A or at 16 A for MD-PA-40A. Press the button to toggle through the values and stop at the one that meets your charging needs. The charger will automatically save the changed value.
NOTE: DANGER! Always make sure the current value you choose meets the specifications as stated in your vehicle's user manual.
STEP 4
Hold the delayed charging time button until the delayed charging time display shows the shortest delayed charging time, ranging from 0 to 12 hours. Press the button to toggle through the values and stop at the one that meets your charging needs. The charger will automatically save the changed value.
NOTE: Time and current adjustments are disabled when the plug is not connected to any vehicle. It is recommended that you customize your charging before plugging the charger into your vehicle.
STEP 5
Hold the quick lock at the end of the plug, insert it into the compatible inlet of your vehicle, and release the lock, being sure it securely binds with the inlet receptor. The luminous cable should come pulsing in blue or red depending on the model of your charger. The standby indicator should show "Charging".

STEP 6
When your vehicle is sufficiently charged, the luminous cable will stop pulsing and dim completely, indicating the charging is finished. Disconnect the plug by holding the quick lock and gently removing it from the inlet. Disconnect the cable from the power outlet. Cover the cable's inlet and your vehicle's port. Store everything away in the provided storage bag, being sure not to twist or fold the cable.
NOTE:
- If you must stop the charging in process, ONLY disconnect the plug to your vehicle first and then the power source.
- For a longer battery life of your vehicle and the charger, we recommend that you unplug only after the charging is finished.
Expert Suggestions for Using a Portable EV Charger
-
Plan ahead: Do some planning ahead of time to know your charging stops when taking long trips, so you stay sufficiently charged.
-
Keep a backup: Store a portable charger in your vehicle for emergencies.
-
Routine maintenance: Regularly maintain your charger and cable to make sure you don't have any frayed or damaged cables.
If you're looking for a reliable portable EV charger, the Orion Motor Tech Level 2 & 1 Portable EV Charger is a great option for you. Some of the key features of this charger are as follows.
-
Dual amperage options: 16A and 40A for flexible charging needs
-
Illuminated cable: Enhances visibility for safer nighttime charging
-
Wide outlet compatibility: Works with NEMA 6-20 and 14-50 outlets
-
Long cable length: 25-foot cable for convenient reach in various parking situations
It is a truly versatile charge, and practical option to use for every day use or emergencies.
Conclusion
For EV owners, using a portable EV charger can provide convenience, freedom, and peace of mind. By learning how to operate your charger and following safe practices, you can give yourself the freedom of reliable, efficient charging anyplace, anytime. Adding a portable EV charger to your routine now!


