Ball joints are crucial components in your vehicle's suspension system. When they become damaged or worn out, it affects steering precision and wheel alignment. Replacing worn ball joints yourself with the proper tools saves money compared to paying a mechanic. This detailed guide covers everything you need to know for DIY ball joint replacement.
What Do Ball Joints Do?
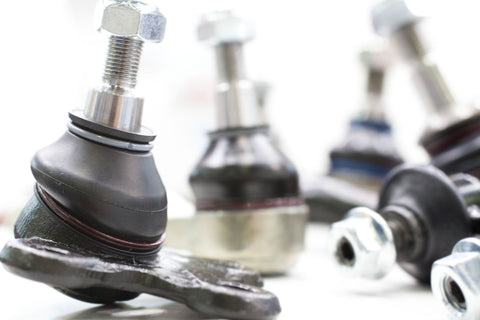
Ball joints are spherical bearings that connect the control arms to the steering knuckles on your vehicle's suspension and steering linkage. They allow the front wheels and tires to pivot and turn smoothly.
Ball joints have a rounded end that fits into a socket. A flexible rubber boot encloses the joint to keep out dirt and retain grease. The constant motion of driving causes the ball joint casing to eventually wear out. Lack of lubrication also contributes to premature failure.
Symptoms of Worn Out Ball Joints
How can you tell when your ball joints need replacement? Look for these common signs:
- Uneven tire wear - Edge of tread wears faster indicating alignment issues
- Wandering, loose steering - Vehicle pulls to one side, hard to keep straight
- Popping or knocking when turning - Damaged joint moves unevenly
- Boot torn - Dirt and water enter to contaminate grease
- Excess play when rocking top and bottom of tire - Up/down motion indicates looseness
If you notice any of these symptoms, inspect the ball joints closely. Have a helper rock the wheels while you watch for excessive play. Catching bad ball joints early prevents further steering and suspension damage.
Ball Joint Anatomy and Function
Ball joints allow free motion in two planes simultaneously:
- Pivoting - Wheels turn left or right for steering
- Articulation - Suspension travels up and down over bumps
The ball stud end connects to the steering knuckle with a tapered hole. A threaded nut secures it in place. The spherical bearing end fits into the control arm socket. It rotates freely within the plastic casing.
A rubber boot covers the ball joint housing. It keeps lubricating grease in and dirt/debris out. Ball stud wear is minimized by the constant grease coating.
Why DIY Ball Joint Replacement?
Replacing worn ball joints restores precise steering control and wheel alignment. The job typically costs $150-$350 for parts and labor at a shop. With DIY ball joint tools, you can do it yourself and save money.
Ball joint replacement is not an overly complicated task. But it does require proper tools and techniques for best results. With some time and patience, you can swap ball joints safely in your home garage.
Selecting Ball Joint Service Tools
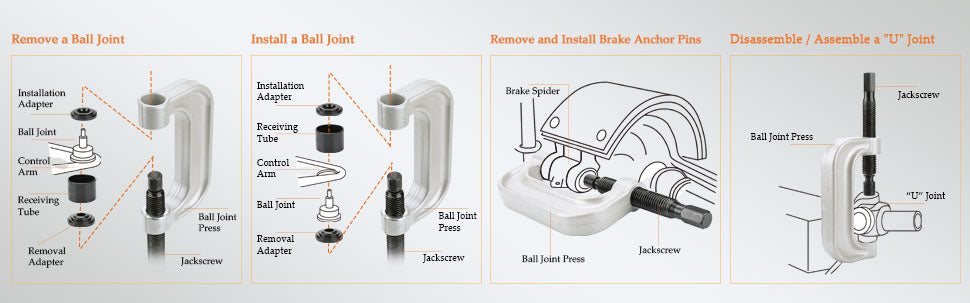
Specialized tools are required to remove pressed-in ball joints and install new ones. A ball joint tool set includes:
- Forked remover tool - Slides behind ball joint to press it out
- Forked installer tool - Holds new ball joint for pressing into socket
- Threaded press rod - Screws through forked tool to apply force
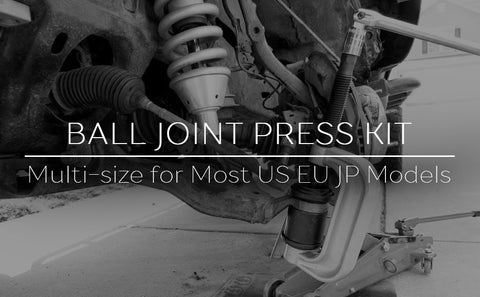
Ball joint tools are made in different sizes such as 3/4 inch, 5/8 inch, and 12mm to fit various cars. Orion Motor Tech ball joint kits feature reinforced steel necks and come in common 3/4 in. and 5/8 in. sizes to fit most domestic vehicles and light trucks.
The forked tools provide up to 5 tons of pressing power. Quick release handles make it easy to reset the tools between steps. A complete DIY toolkit ensures you can remove and install ball joints easily.
Step-by-Step Ball Joint Removal
Follow these step-by-step instructions to safely remove worn ball joints:
- Lift Vehicle and Remove Wheel
- Lift front of vehicle and support securely on jack stands
- Remove wheel for clear access to ball joint
- Disconnect Linkage
- Use wrenches to detach outer tie rod end
- Disconnect brake line bracket from steering knuckle
- Select Forked Remover Tool
- Measure ball joint diameter
- Choose matching forked remover tool
- Position Remover Tool
- Slide remover tool behind ball joint housing until seated
- The forked end should cup rear of ball joint
- Insert Press Rod
- Thread long press rod through forked remover tool
- Attach pressure receiver tool to rod's end
- Press Out Ball Joint
- Turn press rod clockwise slowly to press out joint
- Check progress frequently and reposition if needed
- Remove Ball Joint
- Once the tapered stud is pushed out, remove completely
- Use a hammer if needed to free the ball joint
Take your time and do not strike the tools. Applying steady, even force presses out ball joints safely. Be patient as it can take 15-30 minutes per ball joint.
How to Install New Ball Joints
Follow these steps to properly install new replacement ball joints:
- Prep Ball Joint Seating Area
- Wire brush and sand any rust on control arm socket face
- Clean thoroughly to create smooth surface
- Pack Bearings with Grease
- Insert grease nozzle into ball joint and fill cavity
- Coat bearing surface to prevent binding and aid pivot
- Select Matching Installer Tool
- Choose installer fork sized for new ball joint
- Insert new joint into fork tool until seated
- Thread Press Rod Through
- Pass long threaded rod through installer tool
- Attach pressure receiver tool on the end
- Press In Ball Joint
- Turn rod clockwise slowly to press in new joint
- Pause to check progress and positioning
- Tighten Ball Joint Nut
- Torque new retaining nut to spec in service manual
- Do not over or under tighten
- Reconnect Suspension
- Reattach outer tie rod end and brake line bracket
- Reinstall wheel and lower vehicle
Take care when pressing in new ball joints not to damage the bearing seals or protective boot. Adding fresh grease prevents premature wear and extends service life.
Ball Joint Tool Tips
Here are some helpful tips when using ball joint service tools:
- Never strike or hammer the tools - Gradually turn press rod instead
- Use penetrating oil if ball joint is seized up initially
- Support linking components like tie rod when pressing
- Ensure vehicle is securely lifted on proper jack stands
- Wear ANSI-approved eye protection and gloves
With quality ball joint tools, patience, and proper technique you can replace ball joints like a pro. Match tools to the specific vehicle and joint size for best results.
The Orion Motor Tech Advantage
Orion Motor Tech ball joint tool kits provide everything you need for safe ball joint servicing at home. Key benefits include:
- Heavy-duty steel construction prevents breakage
- Works on a wide range of domestic and import vehicles
- Forged I-beam frame for added pressing strength
- Includes storage case to keep tools organized
- Very affordable compared to pro shop prices
- Detailed instructions for smooth DIY repairs
Follow Steps Correctly for Success Taking the time to correctly follow each step of the ball joint removal and installation process helps ensure a safe and complete repair. With Orion Motor Tech tools, you can replace worn ball joints yourself and get thousands more miles out of your vehicle's suspension.
Check out our other DIY auto repair blog guides for tips on brakes, wheel hub, and constantly velocity joint boot replacement. Proper maintenance keeps your vehicle handling great for the long haul.