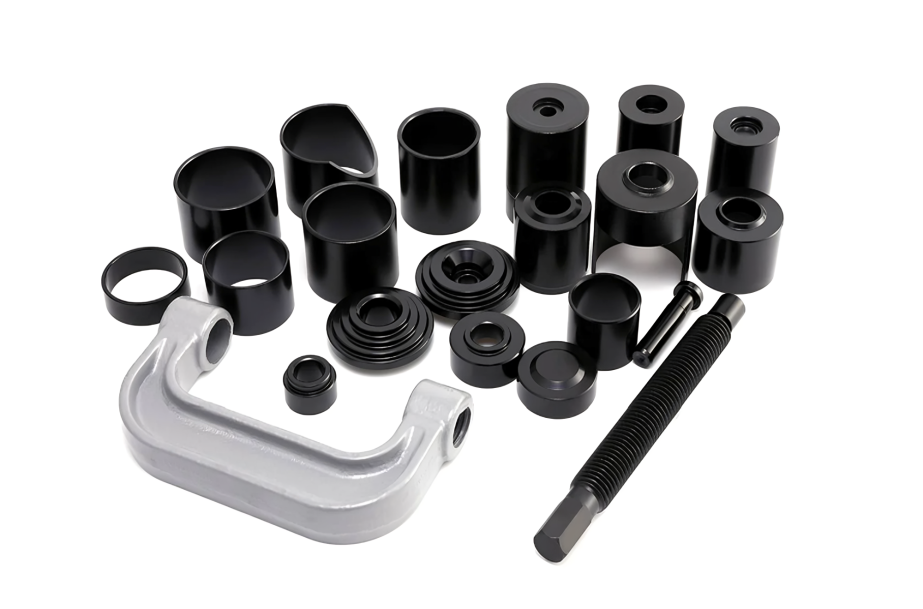
Using a ball joint removal tool is essential for many automotive repair tasks, especially when dealing with suspension components. However, improper use can lead to frustration, damage to your vehicle, or even injury. In this article, we’ll explore the most common mistakes people make when using ball joint removal tools, analyze why these mistakes occur, and provide solutions to help you avoid them.

1. Choosing the Wrong Ball Joint Removal Tool
Why It Happens
Many users may not fully understand the different types of ball joint removal tools available or may assume one tool fits all applications.
Solution
Always check your vehicle’s specifications and ensure you have the correct tool for the specific model before starting your project.
If you want to learn about ball joint removal without tools, you can read more about it here.
You should also research or consult a professional if you’re unsure which tool is appropriate.
2. Neglecting to Remove Snap Rings

Why It Happens
In a rush to get started, users may overlook small but crucial components like snap rings, thinking they can be removed later.
Solution
Take a moment to inspect the ball joint assembly before beginning work. Make it a habit to check for and remove any retaining clips or snap rings before attempting to press out the ball joint.
3. Using Heat Improperly
Why It Happens
Some individuals believe that applying heat will make removal easier without considering the potential risks involved. One of the most alarming risks is the potential for the ball joint to explode. Applying heat can cause any residual grease or lubricant inside the joint to expand rapidly, leading to a buildup of pressure.
Solution
Instead of applying heat, use penetrating oil and allow it to soak in for several minutes. This method is safer and often more effective than heat application.
4. Failing to Align Tools Correctly
Why It Happens
Users may rush through setup or lack experience in aligning tools properly, leading to misalignment during use.
Solution
Take your time during setup. Ensure that the tool is properly aligned with the ball joint before applying force. Consider practicing on a scrap part if you're unsure about alignment techniques.
We also explain how to use a ball joint tool correctly with detailed steps, click here if you are interested.
5. Not Securing the Vehicle Properly
Why It Happens
Some users may underestimate the importance of vehicle stability or might skip this step for convenience.
Solution
Always prioritize safety by using jack stands and wheel chocks whenever working under a vehicle. Make it a standard practice to ensure your vehicle is securely lifted before starting any repairs.
6. Applying Excessive Force Without Technique
Why It Happens
Inexperience or impatience can lead users to apply too much force without understanding how to use their tools effectively.
Solution
Gradually increase pressure while monitoring the tool's alignment and performance. Familiarize yourself with how much force is necessary by reading instructions or watching instructional videos.
7. Ignoring Lubrication Needs
Why It Happens
Users may overlook lubrication due to forgetfulness or a lack of understanding of its importance in reducing friction.
Solution
Make it a routine to lubricate both the tool and the ball joint before use. Keep lubrication supplies handy as part of your automotive toolkit.
8. Rushing the Removing Process
Why It Happens
The desire to complete repairs quickly can lead users to skip important steps or overlook details.
Solution
Set aside adequate time for each repair task. Break down the process into manageable steps and stick to them, ensuring thoroughness over speed.
9. Using Improvised Tools
Why It Happens
Some users may not have access to proper tools and attempt to improvise with what they have on hand.
Solution
Invest in quality tools specifically designed for ball joint removal. For example, Orion Motor Tech offers professional-grade ball joint press tool kits that work with most 2WD and 4WD vehicles from major manufacturers like GM, Ford, and Dodge.
Their heavy-duty forged carbon steel construction with anti-rust finish ensures long-lasting durability for both DIY enthusiasts and professional mechanics.
If you're on a budget, consider renting tools from an auto parts store instead of using makeshift alternatives.
10. Neglecting Post-Removal Inspection
Why It Happens
After completing a task, users may feel relieved and overlook the importance of checking their work for potential issues.
Solution
Always perform a thorough inspection of surrounding components after removing a ball joint. Look for signs of wear or damage that could affect future performance.
Conclusion
Using a ball joint removal tool effectively requires attention to detail, proper technique, and adherence to safety practices.
As you learn why these common mistakes occur and implement the provided solutions, you can ensure a smoother repair process and maintain your vehicle's suspension system effectively.

Consider investing in a comprehensive tool kit like Orion Motor Tech's 21-piece ball joint press set, which includes multiple adapters and a protective carrying case to help you tackle various vehicle repairs confidently and safely.
If you’re ever in doubt about a procedure, consulting a professional or referring to instructional materials is always a wise choice.


