Introduction
One of the primary reasons mechanics and DIY enthusiasts damage their vehicles during repairs is the lack of proper ball joint removal tools. Without specialized equipment, many attempt to force the ball joint out using hammers or makeshift tools, often resulting in costly damage to surrounding suspension components and hours of wasted effort. This common mistake not only leads to expensive repairs but can also compromise vehicle safety.
The frustration of dealing with stuck ball joints becomes even more apparent when you're working against time. Many vehicle owners find themselves trapped in this situation, wondering if there's a better way to handle this crucial repair task.
So, how can you effectively remove ball joints without risking damage to your vehicle or wasting valuable time?
This comprehensive guide will walk you through everything you need to know about ball joint removal tools, ensuring you can complete this critical repair task safely and efficiently.
2. Understanding Ball Joint Removal Tools

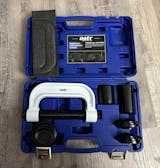
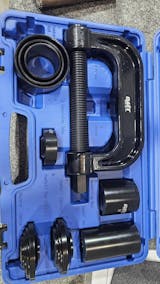
Ball joint removal tools are specialized equipment designed for extracting ball joints without damaging surrounding components. The two primary types are:
- Ball Joint Press: Engineered for press-fit joints, providing even pressure distribution
- Separator Tools: Designed for threaded joints, offering enhanced force control
3. Essential Steps for Ball Joint Removal
1. Preparation Phase: Start by creating a safe working environment. Park your vehicle on level ground and secure it with jack stands. Remove the wheel to access the ball joint clearly. An organized workspace minimizes stress and potential errors during the repair process.
2. Component Disconnection: Before beginning the removal process, carefully detach any obstructing components, including the outer tie rod end and brake line bracket. Patience during this stage prevents complications in later steps.
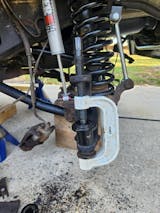
3. Tool Selection and Setup: Measure your ball joint's diameter and choose the appropriate forked remover tool. Proper tool selection directly impacts removal success. Position the tool behind the ball joint housing, ensuring secure placement against the joint.
4. Removal Process: Thread the press rod through your forked remover tool. Attach the pressure receiver tool to the rod's end. Apply gradual clockwise pressure while monitoring alignment throughout the process. Continue steady pressure application until you feel the joint release.
5. Post-Removal Procedures: After successful removal, thoroughly clean the work area and inspect nearby suspension components for potential issues. This proactive approach prevents future complications and ensures complete repair success.
4. Common Challenges of Ball Joints Removal

5. Properly Maintaining a Ball Joint Removal Tool
To ensure longevity and optimal performance of your ball joint removal tool:
- Clean After Use: Wipe down any grease or dirt from your tools after each use to prevent buildup that can hinder performance in future jobs.
- Inspect Regularly: Check for signs of wear or damage before each use—look for cracks in handles or rust on metal parts.
- Lubricate Moving Parts: Apply grease or oil to threaded rods and moving parts regularly to keep them operating smoothly.
- Store Properly: Keep your tools in a dry place away from moisture to prevent rusting over time.

6. Frequently Asked Questions (FAQs)
Conclusion
Mastering everything about using a ball joint removal tool effectively can significantly enhance your automotive repair skills while saving you time during maintenance tasks. By following these structured steps with tools like those from Orion Motor Tech, you can tackle even stubborn joints with confidence.
For more information about purchasing this versatile tool or exploring additional automotive repair resources, visit Orion Motor Tech's website.
Note: This guide serves as a companion to our comprehensive ball joint replacement tutorial. For step-by-step replacement instructions, visit our detailed installation guide.

